Kids’ Travel Binder: Keep Kids Busy on Long Car Rides
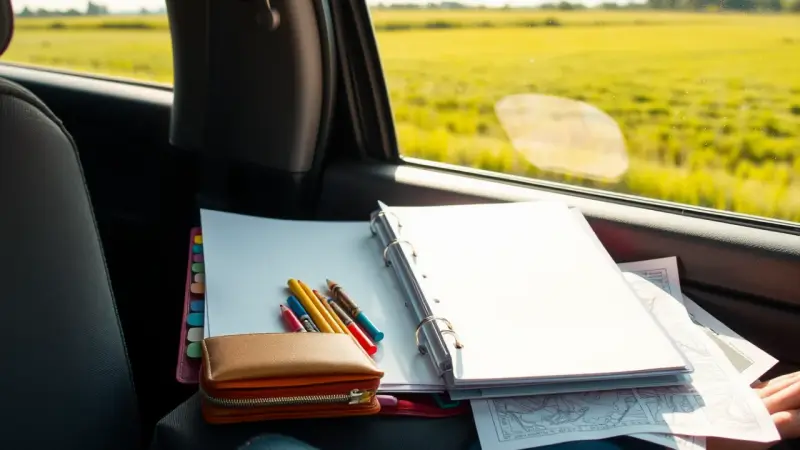
A kids’ travel binder is a three-ring binder that gives each child a personal stash of coloring pages, games and journal sheets. A zippered pouch inside holds the pencils and crayons. It works well for a car trip of six hours or more. Everything stays in one place, and each child has their own supplies.
The most popular page is a map of the United States for the license plate game. Kids find each state on the map, then color it in or cross it off when they spot that plate. Searching the map teaches geography without feeling like a lesson.
Supplies for each binder
- 1 three-ring binder
- 1 zippered pencil pouch made to fit inside a three-ring binder
- crayons, colored pencils or markers
- pencils with erasers
- 1 coloring book or activity book
- a hole punch and a printer, or plain lined and blank paper
The binder-style pouch is worth buying. It keeps art supplies from sliding under seats, and each child has their own set, so nobody argues over a favorite marker.
How to put it together
- Add the pouch first. Snap it into the rings at the front so it is easy to reach. Fill it with the pencils and coloring tools.
- Make the license plate map. Print or draw a simple outline map of the U.S. with the state borders and names. Leave enough room to color each state.
- Make daily trip log pages. Make one page for each day of the trip. Include a space for the date and place, a few lines for writing, and a box for a drawing. Kids fill one in each night before bed.
- Make reflection pages. These are for the drive home or the first days back. Use the same questions for every child, such as favorite part, funniest moment and what surprised them. Adjust the layout for each child’s age.
- Add graphic organizers. One page organizes trip details, with boxes for where, who, what happened and what came next. The second is a Venn diagram for comparing two parts of the trip, such as two rides or two meals.
- Slip in the activity book. Use the pocket, or punch holes in a thin book so it clips into the rings.
- Hand them over. Show the binders the day before you leave. Kids start the trip excited and ready to dig in.
Adjusting pages for different ages
If your children are different ages, make two versions of the reflection pages. Younger children, such as preschoolers and kindergartners, are still learning to write a single sentence. Give them large drawing boxes and just one or two short lines. Early elementary kids who can write several sentences need fewer drawing boxes and more writing lines. Keep the questions the same so siblings can share their answers later.
Variations and tips
- Add a blank page of graph paper for tic-tac-toe and dots-and-boxes.
- Add a scavenger hunt page with things to spot along the road, such as a bridge, a red barn or a water tower.
- Add a page for a trip map where kids trace the route and mark stops.
- Tuck in a few stickers and a small envelope for souvenirs like ticket stubs or postcards.
- Use clear sheet protectors for games and mazes so kids can mark them with dry-erase markers and reuse them.
- For a trip that takes children out of school, the daily log and reflection pages keep some writing and thinking going without feeling like homework.
Before leaving, check that markers are capped and that nothing in the pouch is too small for younger siblings. Keep small items out of reach of children under three. When you travel with several kids, pack a spare binder-friendly pouch of pencils in the front seat for quick fixes.
A binder that has been through a trip makes a nice keepsake. Kids can flip through their logs, maps and drawings and remember the details long after the drive is over.