Cute Cupcake Apron: A Homemade Apron for Little Bakers
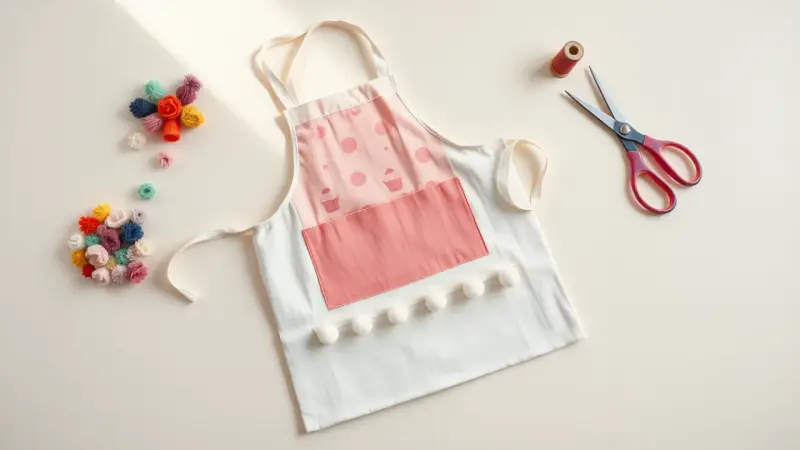
A plain kids’ apron turns into a cupcake-print favorite with one panel of fabric, a row of bouncy pom-pom trim and a few fabric flowers that look like sprinkles on top. It is a beginner-friendly sewing project, and it makes a sweet gift for any child who loves to bake.
The trick is to start with an apron that already has finished binding around its edges. The binding hides your raw edges, so you only need a single line of straight stitching to attach the new fabric.
Supplies
- 1 child-size apron with sewn binding around the edges (canvas or sturdy cotton works best)
- Cupcake-print cotton fabric, about the size of the apron front plus a little extra
- Pom-pom (dingle ball) trim, long enough to run along the edge you want to decorate
- 2 to 3 fabric flowers with layered petals
- Thread in a color that matches the binding, plus a contrasting color for the flowers
- Pins, fabric scissors, a sewing machine and a seam ripper just in case
How to Make It
- Cut the panel. Lay the apron flat on top of the fabric and cut around its outer edge. The binding will cover the edge of your panel, so cutting to the apron’s outline already gives you a seam allowance.
- Clip the curves. Around the rounded armholes and neckline, snip small slits into the allowance so the fabric can bend smoothly instead of puckering.
- Pin the panel. Place the fabric on the front of the apron, just inside the binding, and pin it flat. Fold the clipped edges under as you go.
- Position the trim. Slide the pom-pom trim under the fabric edge, with the balls peeking out, and pin it in place. If you would rather stitch it on top of the fabric, pin it there instead.
- Stitch the panel. Sew one straight line as close to the binding as you can. Go slowly around curves and remove pins as you reach them.
- Add the flowers. Sew a small X through the center of each flower. Then stitch the bottom layer of petals to the apron so the flower sits securely.
- Finish. Trim loose threads and press the apron lightly with a warm iron.
Tips for Pom-Pom Trim
Pom-pom trim can be stubborn because the balls catch under the presser foot. If it fights you, sew it on top of the fabric rather than underneath. Another option is to remove the presser foot entirely and guide the trim by hand, sewing slowly. Keep your fingers well clear of the needle, and lower the needle by hand for the first few stitches.
Pinning closely helps a lot. You can also baste the trim with a few long hand stitches first, so it stays put while the machine does the final seam.
Variations
- Different fabric: Use a gingham, polka dot or strawberry print for a bakery look. Choose a tightly woven cotton so it holds up to flour and frosting.
- Pocket: Cut a small square from the leftover fabric, fold the edges under and topstitch it to the front for a spot to keep a wooden spoon or a recipe card.
- Matching set: Make a second apron in a larger size for a parent, using the same print so baking days feel like a team effort.
- No trim: If you want to skip the pom-poms, add a ruffle or a strip of ribbon along the bottom edge.
- Party favor: Make several panels at once for a cupcake-decorating party, and let each guest wear an apron while they frost.
Care
Wash the apron before the first use if your fabric might shrink, and wash it again on a gentle cycle once it has been worn. Tuck the flowers inside a mesh bag if they have delicate layers. Hang the apron to dry, or press it flat while it is still slightly damp, so the trim keeps its shape.