Frozen-Inspired Pallet Art for a Rustic Christmas
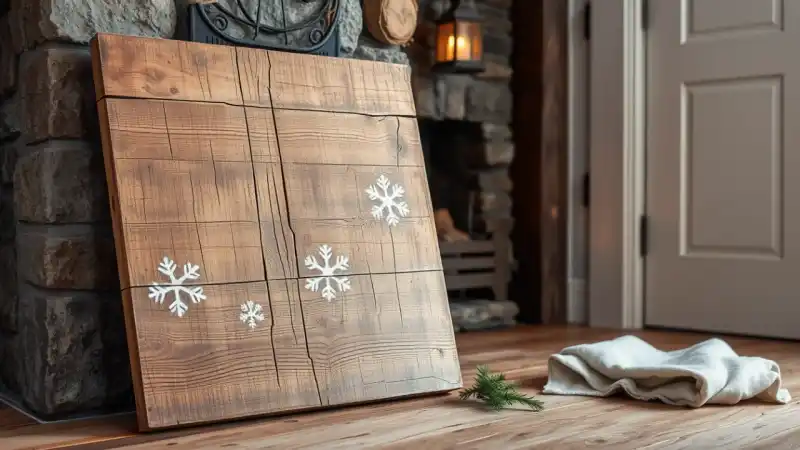
This pallet art has a white, weathered design set into warm wood boards. It nods to Frozen without the powder-blue sparkle, so it fits a mantel, entryway or porch with other Christmas decor. The paint is stained over, so the lettering and snowflake motifs look softly aged.
The technique is simple. You cut a stencil from vinyl, sponge white paint through it onto a wood pallet, then stain the whole board. Here are the questions people ask most about it.
What do you need to make it?
- A wood pallet or pallet-style board, either built from scratch or bought ready-made
- A cutting machine such as a Cricut Explore
- Two 12 x 12 inch sheets of adhesive vinyl
- Transfer tape
- White acrylic paint
- Wood stain (a maple tone gives a warm, honey look)
- A sponge or stencil brush, paintbrushes and a soft rag
Any color of vinyl works. It becomes a stencil and never shows on the finished piece, so you can use scraps in several colors.
How do you make the stencil?
Cut your design from the vinyl with the machine. Choose snowflakes, a winter word or a short phrase in a font you like, and keep the shapes bold. Fine details are hard to paint cleanly on rough boards.
- Weed the design by peeling away the vinyl inside the letters and shapes. What remains is your stencil.
- Cover it with transfer tape, then trim the design into separate pieces so each one is easy to place.
- Lay the pieces out on the pallet before you peel any backing. Moving a piece is much easier before it sticks.
How do you get a clean design on rough wood?
Pallet boards are uneven, and the vinyl won’t grip as well as it does on a smooth surface. That is normal. Press each piece down as firmly as you can, working from the center outward, and rub along the edges so the seal is as tight as possible.
- Dab the white paint on with a sponge. Stay within the stencil and don’t push past the edges.
- Use a small amount of paint each time. A thick glob can creep under the vinyl and blur the lines.
- Build the color up with a few light coats instead of one heavy one. Let each coat dry a little before the next.
- After the final coat, let the paint dry completely. Then peel away the vinyl.
At this stage the design may look faint against the bare wood, especially if the boards are pale. The stain in the next step brings it into focus.
How does the stain finish it?
Brush the stain over the board and wipe away the excess with a rag as you go. Take extra care over the painted design. Rub off most of the stain there so the white stays visible but looks soft and aged, not bright and flat. The surrounding wood takes the stain and gets darker, so the lettering stands out against it.
Leave the piece to dry overnight before you hang it or lean it against a wall.
Can kids help?
Yes, the sponging step is a good one for children. Show them how to dab lightly and not scrub, since scrubbing pushes paint under the stencil. Keep stain and cutting tools for adults. Do the stain in a ventilated space and wear gloves.
What mistakes should you avoid?
- Heavy paint: It bleeds under the stencil. Light coats give sharper edges.
- Skipping the layout: Test the placement first. A design that sits crooked across the boards is hard to fix after painting.
- Peeling too early: Wet paint smears when the vinyl comes off. Wait until it is fully dry.
- Staining the design heavily: Wipe that area well, or the white will disappear into the wood.
- Overly detailed designs: Thin lines and tiny cutouts rarely survive on grooved boards.
How can you style it?
Lean the board on a mantel with greenery, white candles and a few pinecones. Silver or pale-blue ornaments nearby echo the movie’s palette without taking over. You can also hang it by the front door or set it on a shelf in a child’s room for the winter months.
Once the stencil is cut, you can reuse it on another board, a small wood sign or a crate for matching decor.