Fabulous Fabric Frames: Ornate Frames Filled with Pretty Fabric
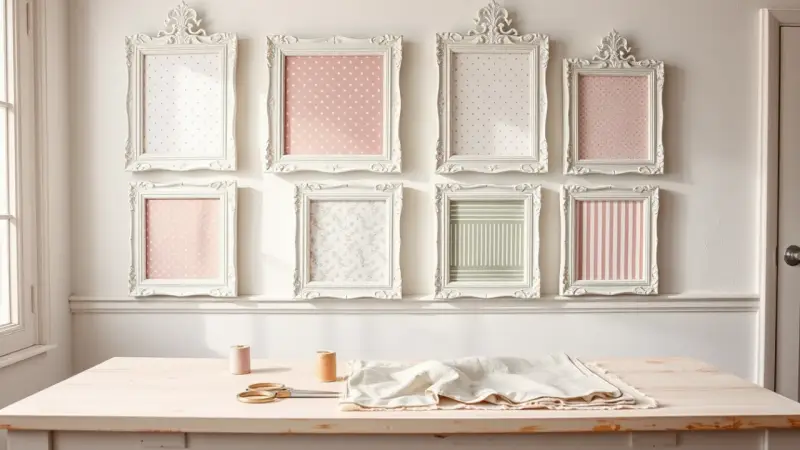
These fabric frames are ornate white picture frames with a piece of fabric where the photo would go. A wall of them in polka dots, florals, damask and stripes fits a girl’s room with a vintage or shabby chic look. The project started with IKEA’s KVILL frames and a few saved fabrics.
Each frame takes only a few minutes. You take the frame apart, trace the paper insert onto fabric, cut it out, glue the fabric to the insert and put the frame back together. You don’t need to sew, and fat quarters or scraps are big enough.
Can you still buy IKEA KVILL frames?
Not new. IKEA has discontinued the KVILL line. You can still find secondhand ones, and some are still sealed in their packaging. KVILL frames were ornate, baroque-style frames made of molded plastic, designed by Helena Svensson.
The frames came in white and ivory, in both oval and rectangle shapes. The rectangle frame has a 5×7″ picture opening, and the frame measures 10.5″ x 9″. That size works well for showing one large flower or a few rows of polka dots.
If you can’t find KVILL frames, any frame with a removable back and a paper or cardboard insert will do. Scrolled, carved-look frames in white or cream give the closest match to the original vintage style.
What do you need to make fabric frames?
- Picture frames, such as IKEA KVILL frames or similar ornate frames
- Fabric of your choice, from fat quarters or scraps
- A pencil or pen
- Scissors
- Adhesive, such as spray adhesive, a glue stick or double-sided tape
For a girly, vintage room, pick fabrics that share one or two colors and vary the prints. The original set mixed a polka dot, a floral, a damask and a striped flannel. Flannel shows its weave and softens the look under the glass. Quilting cotton gives crisper prints.
How do you make fabric frames?
- Take each frame apart and set aside the glass or plastic front, the backing and the paper insert.
- Place the paper insert on the fabric over the part you want to show, then trace around it.
- Cut carefully along the traced lines.
- Put adhesive on the back of the paper insert. Press the fabric firmly in place, smoothing from the center out.
- Put the frame back together and hang it or stand it on a shelf.
Before you trace, move the insert around the fabric like a window. With a floral, center one bloom. With a damask, center one full medallion. Line stripes up with the edge of the insert so they don’t look crooked inside the frame.
How do you keep the fabric smooth and the edges neat?
Iron the fabric before you trace, since creases show clearly under glass. Use a light coat of adhesive, because too much glue can soak through thin cotton and leave dark spots. Spread the glue right to the corners so the edges don’t lift when the frame goes back together.
Cut just inside the pencil line so the fabric doesn’t hang past the edge of the insert. The frame’s lip hides the outer edge, so a tiny trim won’t show from the front. For oval frames, trace and cut the curve slowly in short snips.
Hang frames of different shapes in a loose cluster above a bed or dresser. You can also stand a pair on a nightstand. Children can choose the fabric and help with the pressing, but an adult should handle the glass fronts.
When you take a frame apart, keep each frame’s glass and backing together. Ornate frames from different batches can vary slightly in size, so the parts may not swap between frames.