Craft and Tell Foam Board Photo Display with Photo Corners
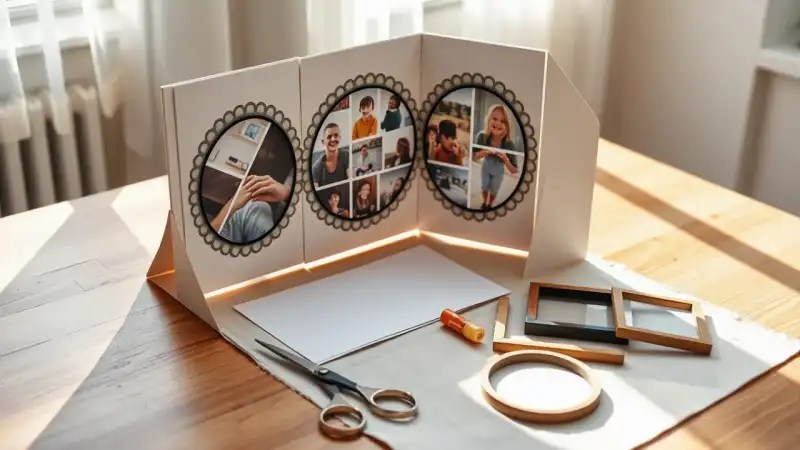
This tabletop display folds open like a little screen. Each panel holds a photo in a circle frame, with scalloped borders and bright photo corners, and the whole thing stands on its own. It works for a shelf, a desk or a party table where each guest shares a favorite memory.
It is also a good project for a craft-and-tell evening. Everyone gets the same basic supplies, makes a display, and then explains what they chose to put on it and why.
Where it fits
A single bi-fold board makes a display about the size of a hardback book when closed. Use it for graduation or birthday photos, a set of vacation snapshots, or a handmade gift for a grandparent. Pick one color family so the panels look planned: three markers or papers in coordinating shades are plenty.
What you need
- 1 bi-fold 9×12 foam board (the kind that already folds in the middle)
- Printed photos, 3 to 6
- Photo corners in assorted colors
- Scrapbook or construction paper in 2 or 3 colors
- Craft knife with a retractable blade, plus a self-healing mat
- Circle cutter
- Decorative-edge scissors
- Glue stick, tape runner, glue dots and tacky glue
- Paint markers and gel pens for lettering and details
- Ruler and pencil
An adult should handle the craft knife. Glue dots and photo corners are small, so keep them away from children under three.
How to make it
- Set the board on the mat. Cover each panel with a sheet of paper trimmed slightly smaller than the panel, and attach it with the tape runner. Tape runners lay down an even line, so the paper stays flat and doesn’t wrinkle.
- Trim a strip of contrasting paper with the decorative-edge scissors. Glue it along the top or bottom of each panel as a border.
- Use the circle cutter to cut a round mat from a third color of paper for each photo. Make each circle a little larger than the picture area you want to show.
- Cut each photo to fit, either trimmed round or left square. Glue the circle mat to the panel with the glue stick, then center the photo on top.
- For a square photo, slip a photo corner onto each corner and press it down. Photo corners hold a picture without glue, so the photo can be swapped later.
- Write a caption or date beneath each photo with a gel pen. Use a paint marker for a bold title across the top.
- Add small touches with glue dots: paper flowers, buttons or flat stickers. Use tacky glue for heavier items such as ribbon bows, and let them dry flat before standing the display up.
- Fold the board into a zigzag so it stands, then adjust the angle until it is steady.
Mistakes to avoid
- Cutting in one pass. Foam board cuts best with several light passes of a sharp blade against a ruler. Pressing hard crushes the edge and tears the paper.
- Gluing photos before planning. Lay out every circle and photo on the panel first. Moving a glued piece can tear it.
- Overloading with tacky glue. Too much makes paper bubble. Use thin lines or dots, and keep wet glue away from the photos.
- Skipping the mat. Cutting on a table scars the surface and dulls the blade. The self-healing mat protects both.
- Using too many colors. Three paper colors and one marker color keep the display tidy, and the photos stay the center of attention.
To make it a gift, tape a short message inside the back panel with the tape runner, or slide a folded card behind one of the photo corners.